honeywell th8321wf1001 installation manual pdf
Honeywell TH8321WF1001 Installation Manual PDF: A Comprehensive Guide
This manual unlocks your Honeywell Th8321Wf1001’s potential! It guides you through features, installation, and operation, ensuring a seamless experience with your new thermostat․
Understanding the Honeywell TH8321WF1001
The Honeywell TH8321WF1001 represents a significant advancement in home climate control, offering a blend of functionality and user-friendly operation․ This Wi-Fi enabled thermostat allows for remote access and control of your HVAC system via a mobile application, providing convenience and energy savings․ It’s designed for ease of installation and integration into existing systems․
Honeywell, a globally recognized technology and manufacturing company, has a rich history dating back to 1885․ Their commitment to innovation is evident in products like the TH8321WF1001, which incorporates features like geofencing and programmable schedules․ Understanding its capabilities is key to maximizing comfort and efficiency; The system’s distributed server architecture supports interconnected control systems, ideal for larger properties․ This manual serves as your guide to harnessing the full potential of this intelligent thermostat․
Key Features and Specifications
The Honeywell TH8321WF1001 boasts several key features enhancing home comfort and energy management․ Wi-Fi connectivity enables remote control via a mobile app, while programmable schedules allow customized temperature settings․ Geofencing automatically adjusts temperatures based on your location, optimizing energy use․ The thermostat supports various HVAC system types and offers flexible programming options․
Specifications include a clear, backlit display for easy readability, and compatibility with Honeywell’s Home app․ It supports multiple heating and cooling stages, ensuring precise temperature control․ The unit operates on standard HVAC voltages and includes features like smart alerts and energy usage reports․ Honeywell’s Experion PKS system structure provides a robust and reliable foundation for its operation, ensuring long-term performance and efficiency within your home environment․
What’s Included in the Box
Upon opening your Honeywell TH8321WF1001 package, you’ll find several essential components for a successful installation․ The box contains the thermostat unit itself, featuring a modern design and intuitive interface․ A mounting baseplate is included, along with screws and wall anchors for secure attachment․ You’ll also receive a wire label kit to simplify the wiring process, ensuring correct connections to your HVAC system․
Furthermore, the package includes a detailed installation guide, providing step-by-step instructions and wiring diagrams․ Honeywell prioritizes user experience, so clear documentation is paramount․ While a C-wire is often required, adapters may be included for systems lacking one․ Finally, you’ll find relevant safety information and warranty details, guaranteeing peace of mind with your new Honeywell smart thermostat․
Installation Process
Begin with safety first! Carefully follow the provided guide, utilizing the correct tools and wiring diagrams for a secure and efficient thermostat setup․
Safety Precautions Before Installation
Prioritize your safety! Before commencing the installation of your Honeywell TH8321WF1001 thermostat, always disconnect power to your HVAC system at the breaker panel․ This crucial step prevents electrical shock and potential damage to the system․ Verify the power is off using a non-contact voltage tester․
Exercise caution when handling wiring; incorrect connections can lead to malfunctions or hazards․ If you are uncomfortable working with electrical wiring, consult a qualified HVAC technician․ Ensure the installation area is dry and free from obstructions․
Read the entire installation manual thoroughly before starting․ Familiarize yourself with the wiring diagram and component identification․ Keep children and pets away from the work area․ Proper grounding is essential for safe operation․ Always adhere to local electrical codes and regulations during the installation process․ Failure to follow these precautions could result in injury or property damage․
Required Tools and Materials
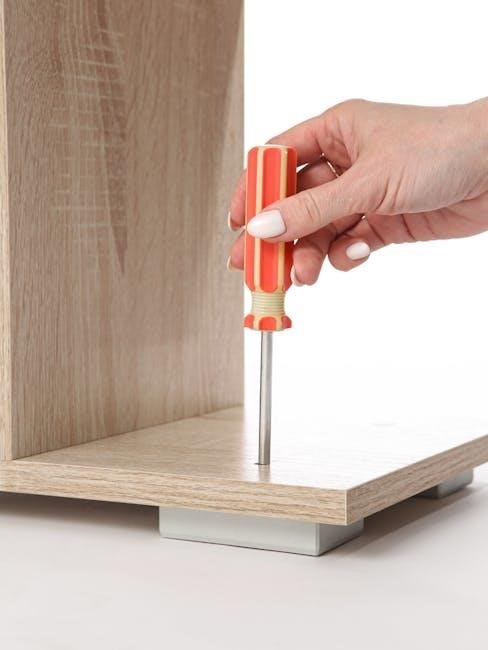
Prepare for a smooth installation! To successfully install your Honeywell TH8321WF1001 thermostat, you’ll need a few essential tools and materials․ A Phillips head screwdriver is crucial for mounting the thermostat base and connecting wiring․ A flathead screwdriver may also be necessary for certain terminal connections․
A wire stripper/cutter will help prepare the wires for secure connections․ A non-contact voltage tester is vital for verifying power is off before working with wiring․ You may also need pliers for bending or manipulating wires․
Ensure you have appropriately sized wire connectors (wire nuts) for making safe and reliable connections․ A level will ensure the thermostat is mounted straight․ Finally, have a pencil for marking screw locations and a drill with appropriate bits for creating mounting holes if needed․ Double-check you have all items before beginning!
Wiring Diagram and Terminal Connections
Understanding the wiring is key! The Honeywell TH8321WF1001 utilizes standard HVAC wiring․ Carefully consult the wiring diagram included with your thermostat and your existing HVAC system’s wiring․ Common terminals include Rh and Rc (power), W (heat), Y (cool), and G (fan)․
The ‘C’ terminal is often required for consistent power; if absent, a C-wire adapter may be necessary․ Ensure wires are securely connected to the correct terminals – incorrect wiring can damage your system․
Label each wire before disconnecting it from the old thermostat to avoid confusion․ Use wire connectors to create secure connections․ A non-contact voltage tester should confirm power is off before any wiring work․ If unsure, consult a qualified HVAC technician․ Proper connections guarantee optimal performance and safety․
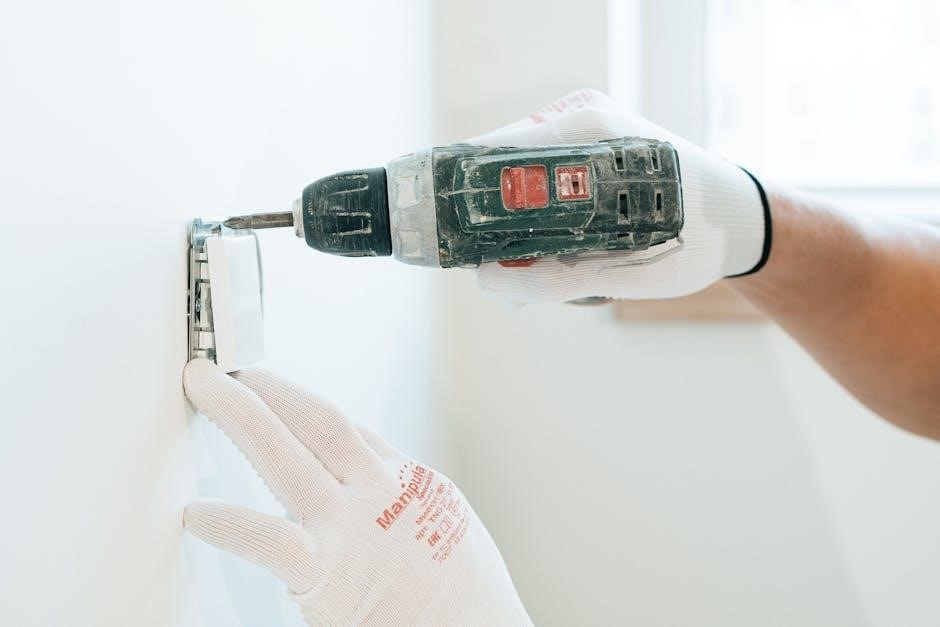
Mounting the Thermostat Base
Secure mounting is crucial for accurate readings! Begin by turning off power to your HVAC system at the breaker․ Remove your old thermostat from the wall, carefully noting the wire routing․ Use the included mounting screws and wall anchors to attach the Honeywell TH8321WF1001 baseplate to the wall․
Ensure the baseplate is level for a professional appearance and proper operation․ Feed the thermostat wires through the opening in the baseplate․
Double-check that no wires are pinched or strained․ The baseplate should sit flush against the wall․ A level ensures accurate temperature sensing․ Once securely mounted, proceed with connecting the wires to the appropriate terminals, referencing the wiring diagram․
Connecting to the HVAC System
Precise wiring ensures seamless HVAC control! Refer to the detailed wiring diagram included with your Honeywell TH8321WF1001․ Carefully connect each wire to the corresponding terminal on the thermostat base․ Common terminals include Rh, Rc, W, Y, G, and C․
The ‘C’ wire, or common wire, is often required for consistent power․ Double-check each connection to prevent shorts or malfunctions․
Ensure wires are securely fastened to the terminals․ A loose connection can cause intermittent operation or damage․ Once all wires are connected, gently push any excess wire back into the wall․ Verify all connections against the wiring diagram before restoring power to your HVAC system․ Incorrect wiring can damage your equipment!
Initial Setup and Configuration
Begin customizing your thermostat! Power on, connect to Wi-Fi, register the device, and accurately set the date and time for optimal performance․
Powering On and Initial Boot-Up
Initial Power-Up Sequence: After physically installing the thermostat and ensuring proper wiring connections to your HVAC system, the Honeywell TH8321WF1001 will initiate its boot-up process upon receiving power․ Observe the display screen; it should illuminate, displaying the Honeywell logo and a progress indicator․ This initial startup may take several moments as the thermostat performs self-diagnostics and loads its operating system․
Display Verification: Confirm that the display is functioning correctly and clearly visible․ If the screen remains blank, double-check the power supply connections at both the thermostat and the HVAC system’s control board․ A lack of power is the most common reason for a failed boot-up․ Ensure the system’s breaker is switched on․

First-Time Setup Prompts: Following the initial loading sequence, the thermostat will guide you through a series of first-time setup prompts․ These prompts will typically include language selection, date and time configuration, and network setup options․ Proceed through these prompts carefully to personalize your thermostat’s settings․
Connecting to Wi-Fi Network
Initiating Wi-Fi Setup: From the thermostat’s main menu, navigate to the network settings․ Select the option to connect to a Wi-Fi network․ The thermostat will begin scanning for available wireless networks within range․ Ensure your home Wi-Fi network is broadcasting and operating on a 2․4 GHz frequency, as the TH8321WF1001 typically doesn’t support 5 GHz networks․
Network Selection & Password Entry: A list of detected networks will appear on the display․ Choose your network from the list․ You will then be prompted to enter your Wi-Fi password using the thermostat’s touchscreen interface․ Double-check the password for accuracy, as incorrect credentials will prevent a successful connection․
Connection Confirmation: Once the password is entered, the thermostat will attempt to connect to the network․ A successful connection will be indicated by a Wi-Fi signal icon appearing on the display․ If the connection fails, verify the password and network settings, and try again․
Registering the Thermostat
Account Creation or Login: To fully utilize the remote access and advanced features of your Honeywell TH8321WF1001, registration is essential․ Download the Honeywell Home app on your smartphone or tablet․ Launch the app and either create a new account or log in with an existing Honeywell Home account․
Thermostat Pairing: Within the app, select the option to add a new thermostat․ The app will guide you through the process of pairing your thermostat․ This typically involves entering the thermostat’s unique identification number, often found on the device itself or its packaging․
Account Linking & Verification: Follow the on-screen prompts to link the thermostat to your Honeywell Home account; You may be required to verify your email address or phone number to complete the registration process․ Registration unlocks remote control, scheduling, and access to support resources․
Setting Date and Time
Initial Synchronization: Upon initial power-up and Wi-Fi connection, the Honeywell TH8321WF1001 will often attempt to automatically synchronize the date and time with a network time server․ However, manual adjustment may be necessary to ensure accuracy, especially if the automatic synchronization fails․
Accessing the Settings Menu: Navigate to the thermostat’s settings menu using the touchscreen interface․ Locate the “Date and Time” option within the settings․ This is usually found under a “System” or “General” category․
Manual Adjustment: Within the Date and Time settings, you can manually set the current date, month, year, hour, and minute․ Confirm your selections to save the changes․ Accurate date and time settings are crucial for proper scheduling and operation of your thermostat․
Operating the Honeywell TH8321WF1001
Mastering your thermostat is easy! Explore the user interface, program schedules, enjoy remote access via the mobile app, and utilize geofencing features․
Understanding the User Interface
Navigating the Honeywell TH8321WF1001’s interface is straightforward, designed for intuitive control of your home’s climate․ The touchscreen display presents key information at a glance – current temperature, setpoint, mode (Heat, Cool, Auto, Off), and fan settings․ Swiping gestures allow easy access to scheduling options, system settings, and Wi-Fi connectivity status․
Icons clearly represent different functions, minimizing confusion․ A prominent ‘Hold’ button temporarily overrides programmed schedules, while the ‘Menu’ icon unlocks advanced configuration options․ The display also indicates system status, such as when the HVAC system is actively heating or cooling․
Brightness adjustments ensure readability in various lighting conditions․ Familiarize yourself with the quick view options for frequently adjusted settings․ The interface is designed to be user-friendly, even for those new to smart thermostats, providing a comfortable and efficient control experience․
Programming Schedules
The Honeywell TH8321WF1001 excels in energy savings through customizable scheduling․ You can create unique temperature programs for each day of the week, tailoring comfort to your lifestyle․ The interface allows setting multiple periods per day – Wake, Leave, Return, and Sleep – each with a specific temperature setpoint․
Flexible scheduling options include 7-day, 5-2 day, and 5-1-1 day programs, accommodating varying weekly routines․ Temporary holds override schedules for short-term adjustments, while permanent holds lock in desired temperatures․
Smart features learn your preferences over time, optimizing schedules for maximum efficiency․ The thermostat remembers your adjustments, suggesting personalized settings․ Detailed programming ensures consistent comfort and reduced energy consumption, making it a valuable investment for any home․
Remote Access via Mobile App
The Honeywell Home app unlocks complete control of your TH8321WF1001 from anywhere with an internet connection․ Download the app (iOS and Android compatible) and connect it to your registered thermostat for seamless remote management․ Adjust temperature settings, view current conditions, and monitor energy usage—all from your smartphone or tablet․
Receive alerts for critical events, such as extreme temperature fluctuations or system malfunctions, ensuring prompt attention․ The app mirrors the thermostat’s interface, providing familiar navigation and intuitive controls․
Geofencing integration automatically adjusts temperatures based on your location, maximizing energy savings when you’re away and ensuring comfort upon your return․ Remote access simplifies home climate control, offering convenience and peace of mind․
Using Geofencing Features
The Honeywell TH8321WF1001’s geofencing capability offers automated comfort and energy savings․ Through the Honeywell Home app, define a virtual perimeter around your home․ When your smartphone enters or exits this zone, the thermostat automatically adjusts to pre-set temperatures․
Create customized schedules for “Home” and “Away” modes, optimizing energy usage without manual intervention; For example, lower the temperature when everyone leaves and raise it shortly before your expected return․

Multiple users can be included in the geofencing setup, ensuring accurate detection of occupancy․ This feature eliminates wasted energy and provides a consistently comfortable indoor environment, adapting to your lifestyle seamlessly․ Geofencing enhances convenience and reduces utility bills․

Troubleshooting Common Issues
Encountering problems? This section provides solutions for typical issues like power failures, Wi-Fi connectivity, inaccurate readings, and unresponsive HVAC systems․

Thermostat Not Powering On
If your Honeywell TH8321WF1001 fails to power on, several factors could be at play․ First, verify the circuit breaker controlling the HVAC system hasn’t tripped․ Reset it if necessary․ Next, carefully inspect the thermostat wiring, ensuring all connections at the terminal block are secure and correctly matched to your system’s configuration․
A common issue involves the ‘C-wire’ (common wire), which provides continuous power․ Confirm a C-wire is present and properly connected; if absent, a C-wire adapter might be required․ Check the thermostat’s battery compartment (if applicable) and replace batteries if depleted․
Also, ensure the HVAC system’s power switch is turned on․ If the problem persists, consult a qualified HVAC technician to diagnose potential issues with the HVAC unit itself or the wiring infrastructure․ Incorrect wiring can cause damage, so professional assistance is recommended․
Wi-Fi Connection Problems
Experiencing difficulty connecting your Honeywell TH8321WF1001 to Wi-Fi? Begin by verifying your home network is functioning correctly and that the thermostat is within range of your router․ Double-check the Wi-Fi password entered during setup – even a minor typo can prevent connection․ Restart both your router and the thermostat; a simple reboot often resolves temporary glitches․
Ensure your router’s security settings are compatible; WPA2 is generally recommended․ Some routers may have bandwidth limitations or MAC address filtering enabled, potentially blocking the thermostat․ Temporarily disable these features to test connectivity․
If issues persist, try resetting the thermostat’s network settings and repeating the Wi-Fi setup process․ Refer to the Honeywell support website for specific troubleshooting steps and firmware updates that may address known connectivity issues․
Incorrect Temperature Readings
Is your Honeywell TH8321WF1001 displaying inaccurate temperatures? First, ensure the thermostat isn’t directly exposed to sunlight, drafts, or heat-generating appliances, as these can skew readings․ Verify proper airflow around the unit; obstructions can affect temperature sensing․ Calibrate the thermostat through the settings menu – a temperature offset adjustment may be necessary․
Confirm the thermostat is level; an uneven installation can impact accuracy; Check for nearby sources of interference, like electronic devices, that might disrupt the sensor․ If the problem continues, try a soft reset of the thermostat to clear any temporary errors․
Consult the Honeywell support website for detailed calibration instructions and potential sensor issues․ Consider professional assistance if readings remain consistently incorrect․
HVAC System Not Responding
If your HVAC system isn’t reacting to the Honeywell TH8321WF1001, begin by verifying the system’s power supply – check breakers and ensure the furnace/AC unit is switched on․ Double-check the wiring connections at both the thermostat and the HVAC system, referencing the wiring diagram in this manual․ Confirm the thermostat is set to the correct mode (Heat, Cool, Auto, Off)․
Inspect the HVAC system’s air filter; a clogged filter can prevent proper operation․ Try manually activating the HVAC system directly at the unit to bypass the thermostat․ If it responds, the issue lies with the thermostat or wiring․
Consult the Honeywell support website for troubleshooting guides and potential compatibility issues․ Professional HVAC assistance may be required for complex problems․
Additional Resources
For further assistance, explore the Honeywell support website and its comprehensive FAQ section․ These resources provide valuable troubleshooting tips and detailed information․
Honeywell Support Website
Accessing the Honeywell Support Website is crucial for maximizing your thermostat experience․ This online portal serves as a central hub for a wealth of information pertaining to the TH8321WF1001, including downloadable PDF versions of the installation manual, troubleshooting guides, and frequently asked questions․ You’ll find detailed explanations, helpful videos demonstrating installation steps, and solutions to common issues encountered during setup and daily operation․
The website also offers a robust search function allowing you to quickly locate specific information based on keywords or error codes․ Furthermore, Honeywell provides direct access to their customer support team through online chat or phone, enabling personalized assistance when needed․ Regularly checking the support website ensures you have the latest updates, firmware downloads, and compatibility information for your thermostat, guaranteeing optimal performance and longevity․ Don’t hesitate to utilize this valuable resource!
Frequently Asked Questions (FAQ)
Here are some common questions regarding the Honeywell TH8321WF1001 and its installation: Q: Where can I find a digital copy of the installation manual? A: It’s readily available on the official Honeywell Support Website as a downloadable PDF․ Q: What if my thermostat isn’t powering on after installation? A: Double-check the wiring connections and ensure the C-wire is properly connected․ Q: I’m having trouble connecting to my Wi-Fi network․ A: Verify your network password and ensure the thermostat is within range of your router․
Q: Can I control the thermostat remotely? A: Yes, using the Honeywell Home mobile app․ Q: Is professional installation required? A: While not mandatory, it’s recommended if you’re unfamiliar with HVAC wiring․ Q: What does the error code E1 mean? A: Consult the manual or Honeywell Support for specific troubleshooting steps related to that code․